Image Tutorial – ‘Heading North, Heading Home’
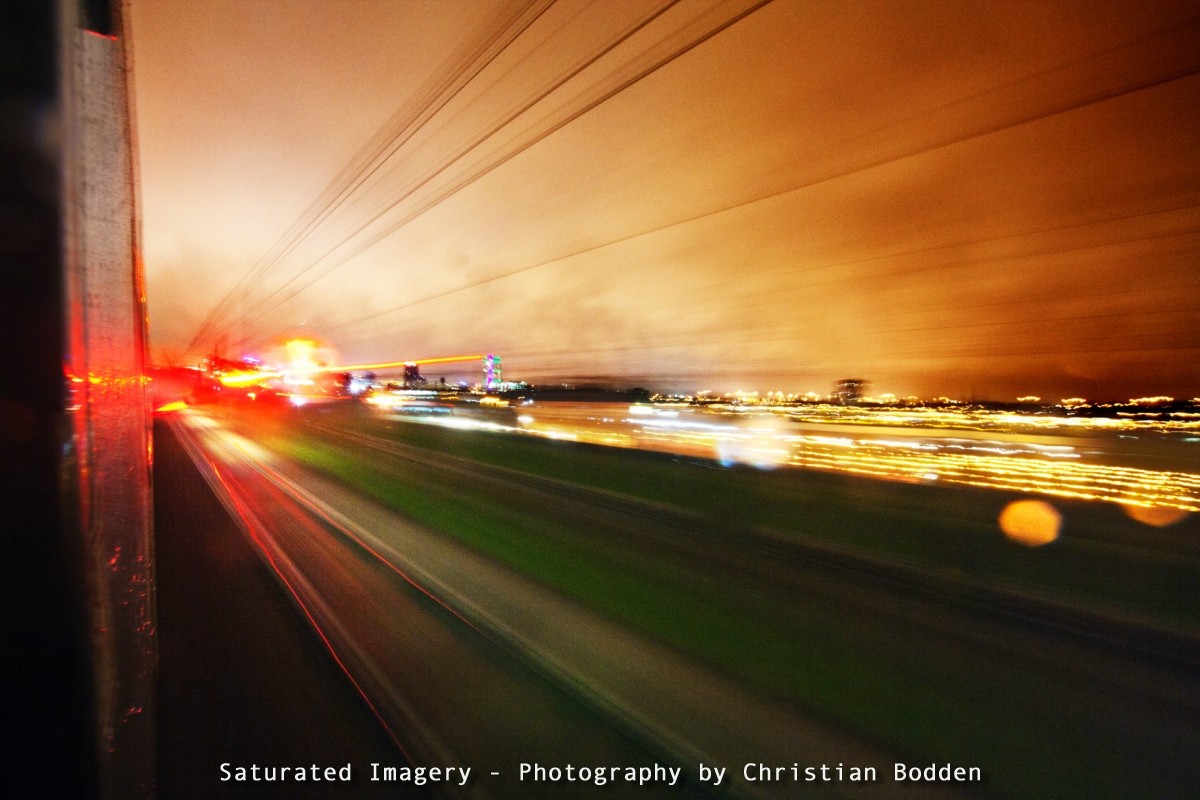
Today I would like to share a tutorial about how I made one of my recent images – ‘Heading North, Heading Home’. My idea for this image was something a little crunchy – not fully crisp and bright, but blending the dirt of a northern city, with the light trails of the moving train. Something slightly film-esque (yes, I know I should shoot to film if I want it to be like film, but this is what I had to hand when I took the original shots) with a dark feel to it.
The Image
I took this image from the window of the London Kings Cross to Leeds train, at about 10pm, in May – there was still a big glow from the city lights in the sky, a bit of cloud, bathing everything in a nice warm orange glow.I took this using a Canon EOS 1000D and Sigma 10-20mm f/3.5 poked out of the window of a moving train.
I will, at this point add a brief note. Sticking your head out of moving trains can be dangerous, as my girlfriend reminded me at length afterwards, though I reminded her that while I might risk my life for my art, I wouldn’t risk my camera. But, being serious, this is not something to mess about with. There is a reasonable amount of clearance between two trains, and the between the train and most track-furniture, but you need to be sensible. Do not actually start doing this when the train is moving. Peek carefully along the side of the train, don’t go sticking your head right out. Listen carefully to make sure a train is not coming past, from both directions. When you are ready, hold the camera in place with as little of you out of the window as possible – don’t keep your head stuck out looking through the view finder, use live view. You do this at your own risk…
How I made it
For any kind of experimental shot like this, it is worth making sure that you have a good set of base images to work from. I took about 8 for this, more may have been useful, but that was what I managed to fit into the time that I felt safe. As I said above, I was working fast, and for the long exposures framing without the viewfinder. I took a variety, both trying to get a static scene, and a motion blur. In the end, I decided that the static shots were just not sharp enough, which is a part of how this image came about.

Basic Adjustments
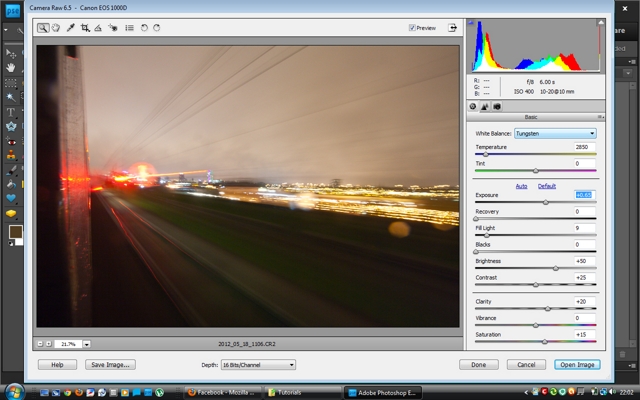
This is the shot how it looked out of the camera – or rather, how it opened in Adobe Camera Raw on default settings. The exposure for this was 6s, f/8, ISO 400. The lens was fully wide at 10mm. I didn’t use the lens hood, so have some lovely flare to play with.

Now to start editing:
The first thing I did was to set the white balance. The setting the camera had chosen was too orange, so I had a bit of a play with this. In the end I settled on my first test, tungsten balance, as this is effectively what the majority of the lights in a city night-scape actually are. This seems to have taken quite a lot of the colour out of the sky, but don’t worry – this will be back later.
The next thing to do is set the exposure. The image below shows the settings I used.
In the end I did very little to this shot. This was because I had in mind what I wanted to do in photoshop and instead of creating a final image with the Raw converter I wanted to create a palate from which to work.
I tend to leave the exposure slider until last, preferring the finer controls. This is contrary to accepted wisdom, but often works for me. Getting an image (especially one where you have been forced to under-expose, for example) is often a juggling act between the controls, particularly exposure and brightness (which differs from exposure by not clipping the highlights, instead compressing the lighter tones).
The first thing I did in this image, was open up the shadows. I did this by dropping the blacks back to zero and pulling the fill light up to 9. I had no need for recovery as there were no major blown highlights, other than obviously the light streaks. I upped the exposure to +0.65 (2/3 of a stop for those of us used to thinking like that) which moved the low end of the histogram away from the zero point.
I then moved the clarity up to +20 to introduce a slight local contrast, and pushed the saturation (which saturates all tones, unlike vibrance which favours less saturated tones) up to +15.
At this point, the image looks too light, and frankly a shadow of the original shot, but this is where I wanted to be to work from in creating my final image. Time to hit open, and move into the Photoshop environment.
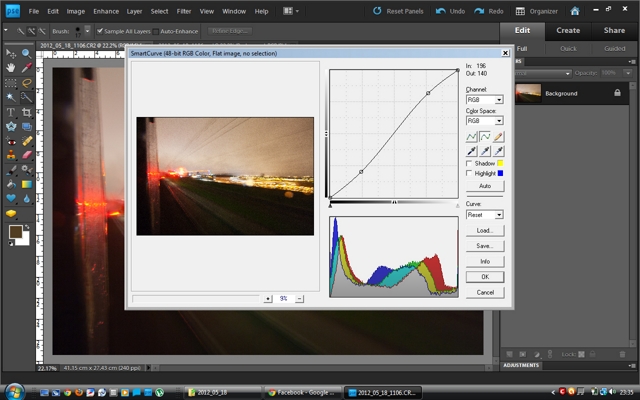
The next stage was a basic curves adjustment. The s-shape I have used here (as shown above) in an RGB space boosts the contrast in a very natural way whilst making the image really ‘pop’ and also has the effect of boosting the saturation. This is why I left the Camera Raw image slightly light. Using elements 9 I don’t have access to the full curves control, so this was done using a plug-in called Smartcurve. This does of course mean that I couldn’t use an adjustment layer. Common wisdom says to work on a copy of the background layer, but I don’t quite see the point in this situation as I can just re-open the Raw file if need be, I am not ‘destroying’ any pixels…
Local Adjustments
Next up, is editing the local areas of the image. For this I did use adjustment layers – five of them. In elements 9, these cannot be done when working in 16 bit mode. So now is the time you need to convert to 8 bit. That done, I started work on the skies.
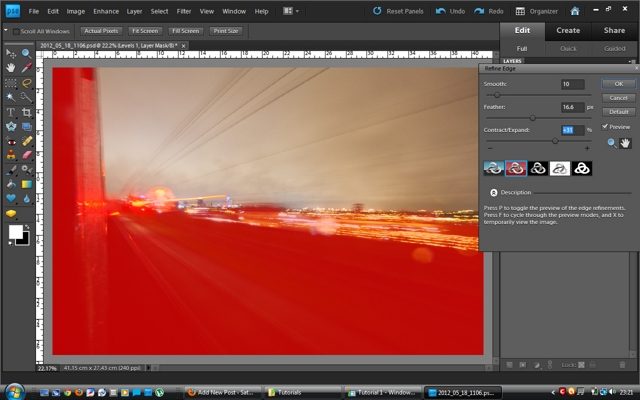
Using the quick select wand in the tool palate, I selected the main sky area. This took a few attempts, and I needed to deselect the side of the train a few times until I got it right. I then went to refine edge (the button is in the border above the image, when making a selection) to even out the way the selection covered the area. I smoothed the edges with a setting of about 10, and then adjusted the feather and contract/expand settings to that the fade out on the selection covered the area with the light trails, allowing a small ‘halo’ of a dark edge at the top of the foreground.
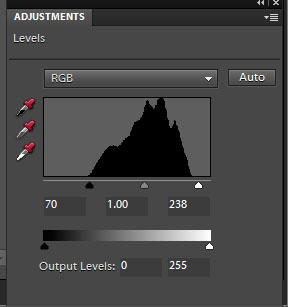
From this selection I created a new levels adjustment layer (layer>new adjustment layer > levels…) and in the adjustment box that appears to the right I set the sliders on the histogram to the levels I wanted. I set the left slider to 70, which is the point where the ‘hump’ of the histogram starts. This sets the darkest pixel in the selection to an output level defined on the sliders below – which in this case I left alone, giving the darkest pixel a value of 0 – pure black. I then moved down the right hand slider (the white point) until the selection started to look how I wanted – in this case not quite pure white as the slider is not touching the edge of the histogram. The more astute of you will notice that you could do the same by setting the slider to the edge of the histogram and changing the bottom right hand slider – try both, they will affect the midrange slightly differently. The image below shows you what I mean here.
I then copied this layer, and adjusted the levels again. On this one I pulled the black point in even more, to 26 and then pulled the midpoint right to 0.88, darkening the area again.
I then reselected the same area, but I used a larger value for for feather and grew the selection slightly. I introduced a new adjustment layer, this time Brightness/contrast, using values of 13 and 55 respectively.
As you can see, this set of adjustments has brought out a very high level of contrast and saturation into an originally somewhat uniform sky, enhancing the clouds, and also the natural vignetting of the wide angle lens.
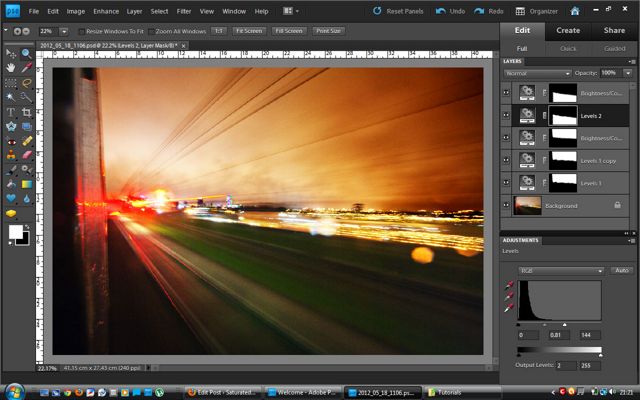
The next stage was to work on the tracks. I selected the track area in the same way, and created a new levels adjustment layer. I set the values on this to a black point of zero, a white point of 144 and a midpoint of 0.81. I lifted the output to 2. The screenshot below shows this adjustment, and the masks for all the layers.
Final Adjustments
The final layer is another brightness/contrast layer, with settings of brightness 72 and contrast 39. This brightens the area again, but crisps up the shadows.
There you go. One thing to note about this image, is that there is nothing in these adjustments which is outside of what could be done in a darkroom.
An alternative Interpretation
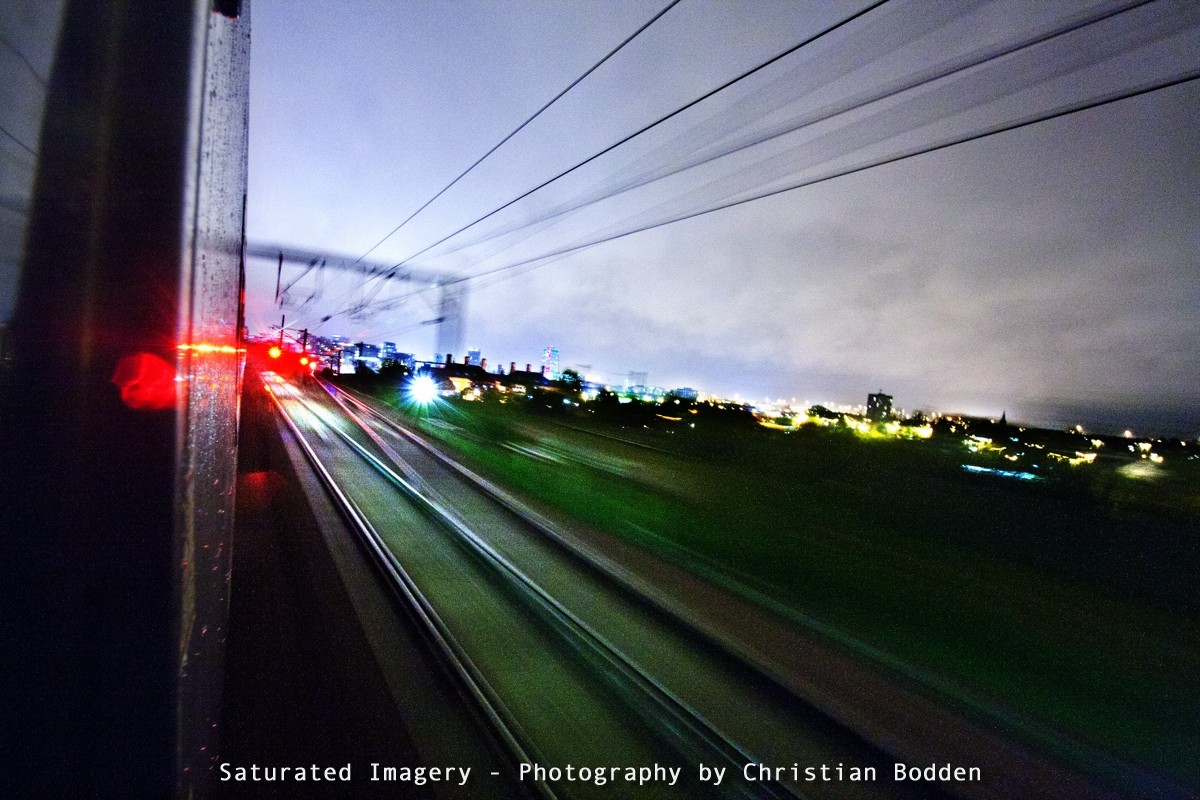
There is one last ting I will show you. Although I love this image, alternate versions never go amiss, particularly if you want to use or provide images for any design applications where colours might be important to the overall look. I took one of the other shots I made for this alternative version. This was constructed in much the same way, with one key difference – I started with a totally different white balance – setting this to 2350k. This is actually only a little cooler than the tungsten setting (2850k) but was enough to take all the orange out of the sky, turning this evening scene into one which could have been take in the moments before dawn. I then tweaked the other settings and the layers to create a far lighter image with this blue feel. The result is below.
I will be posting the rest of the images from this trip to London soon, where I shot a series of urban landscapes in The Barbican, The South Bank and London Bridge featuring The Shard.
1 thought on “Image Tutorial – ‘Heading North, Heading Home’”